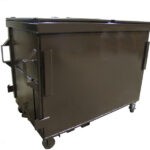
We have several blogs about the importance of cleaning and tools and equipment (Evaluating degreasers: what you need to know , Tool hacks to save time and money cleaning, How can we clean more often?). Now it is time to get to the how to of cleaning the garbage room and related equipment. Today’s focus is on the bins and how to get them nice and clean. There aren’t many steps to washing a bin, but it’s important to do them in the correct order. That way they come out germ and grease free. It’s also key to clean the bins every time the garbage truck empties them to neutralize odours and stop flies and pests from being attracted inside (and using the bins as a breeding ground).
The first step in the process is to remove any leftover material that did not empty during pick-up. Getting rid of this now allows the cleaning products to get into the bottom of the bin and start to work on the grease. It also helps to keep drains clear.
When cleaning garbage bins, measuring matters, foam helps

Once the larger items, such as plastic bags, are cleaned out of the bin it’s time to apply degreaser. Use this as per the manufacturers guidelines. We recommend a metering applicator that automatically dilutes the degreaser to the correct strength and creates a foam. This eliminates the measuring and dilution step. It is also faster.

Foam is useful for several reasons. First, it allows the degreaser to “stick” to the walls of the bin better than just sprinkling it on. This ensures full coverage to allow the degreaser to work on the grease. Secondly it makes it really easy to see where the degreaser has been applied so no spots get missed. Finally, the bubbles act as miniature scrubbers so that the there is much less scouring needed.
The next step: wait…or scrub
Depending on the strength of the degreaser, both are effective. If the degreaser is not designed for compactor rooms you may need to scrub the surfaces. Some degreasers no not require scrubbing. Then, waiting is easier and just as effective. Just let the degreaser has work its’ magic on the bins for as long as the manufacturer suggests.

The next step: rinse
After this is complete, it’s time to rinse. This allows all the dirt and grime that has been lifted off the walls and bottom of the bin to drain out the bottom, leaving it clean and fresh. Leave the bins to dry and then put them away.
That’s it: clean, dry garbage bins with less bacteria and smell
It is important to clean the bins regularly as it decreases garbage odours wafting around the building. If bins are not washed, residents sometimes smell the garbage in odd places wherever the air circulation system sends air after it leaves the garbage room. Also, cleaning gets rid of dirt and grime that builds up stink, as well as the bacteria that cause it in the first plac
